Portal Branding
Prerequisites
Admin Access to the Micorosft Teams Phone Connector Portal.
General
This section lets you customize several general Enterprise or Service Portal webpage elements. The goal is to promote your brand to business customers. From the main menu, select Branding > Portal> General
Inputs:
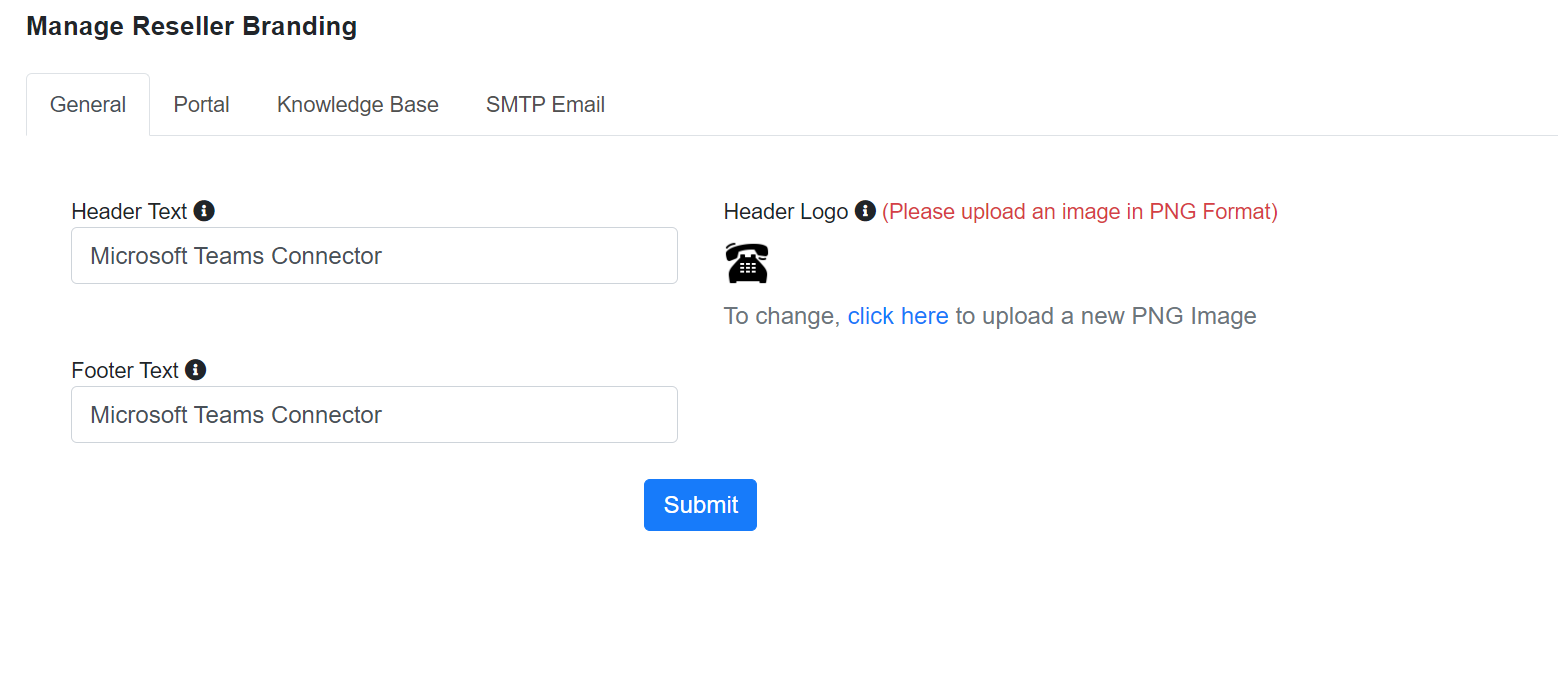
- Header Text: Label the provisioning portal.
- Header Logo: Choose your company logo. Ensure it is in PNG format and 64 by 64 pixels.
- Footer Text: Label the footer text at the bottom of each provisioning portal page.
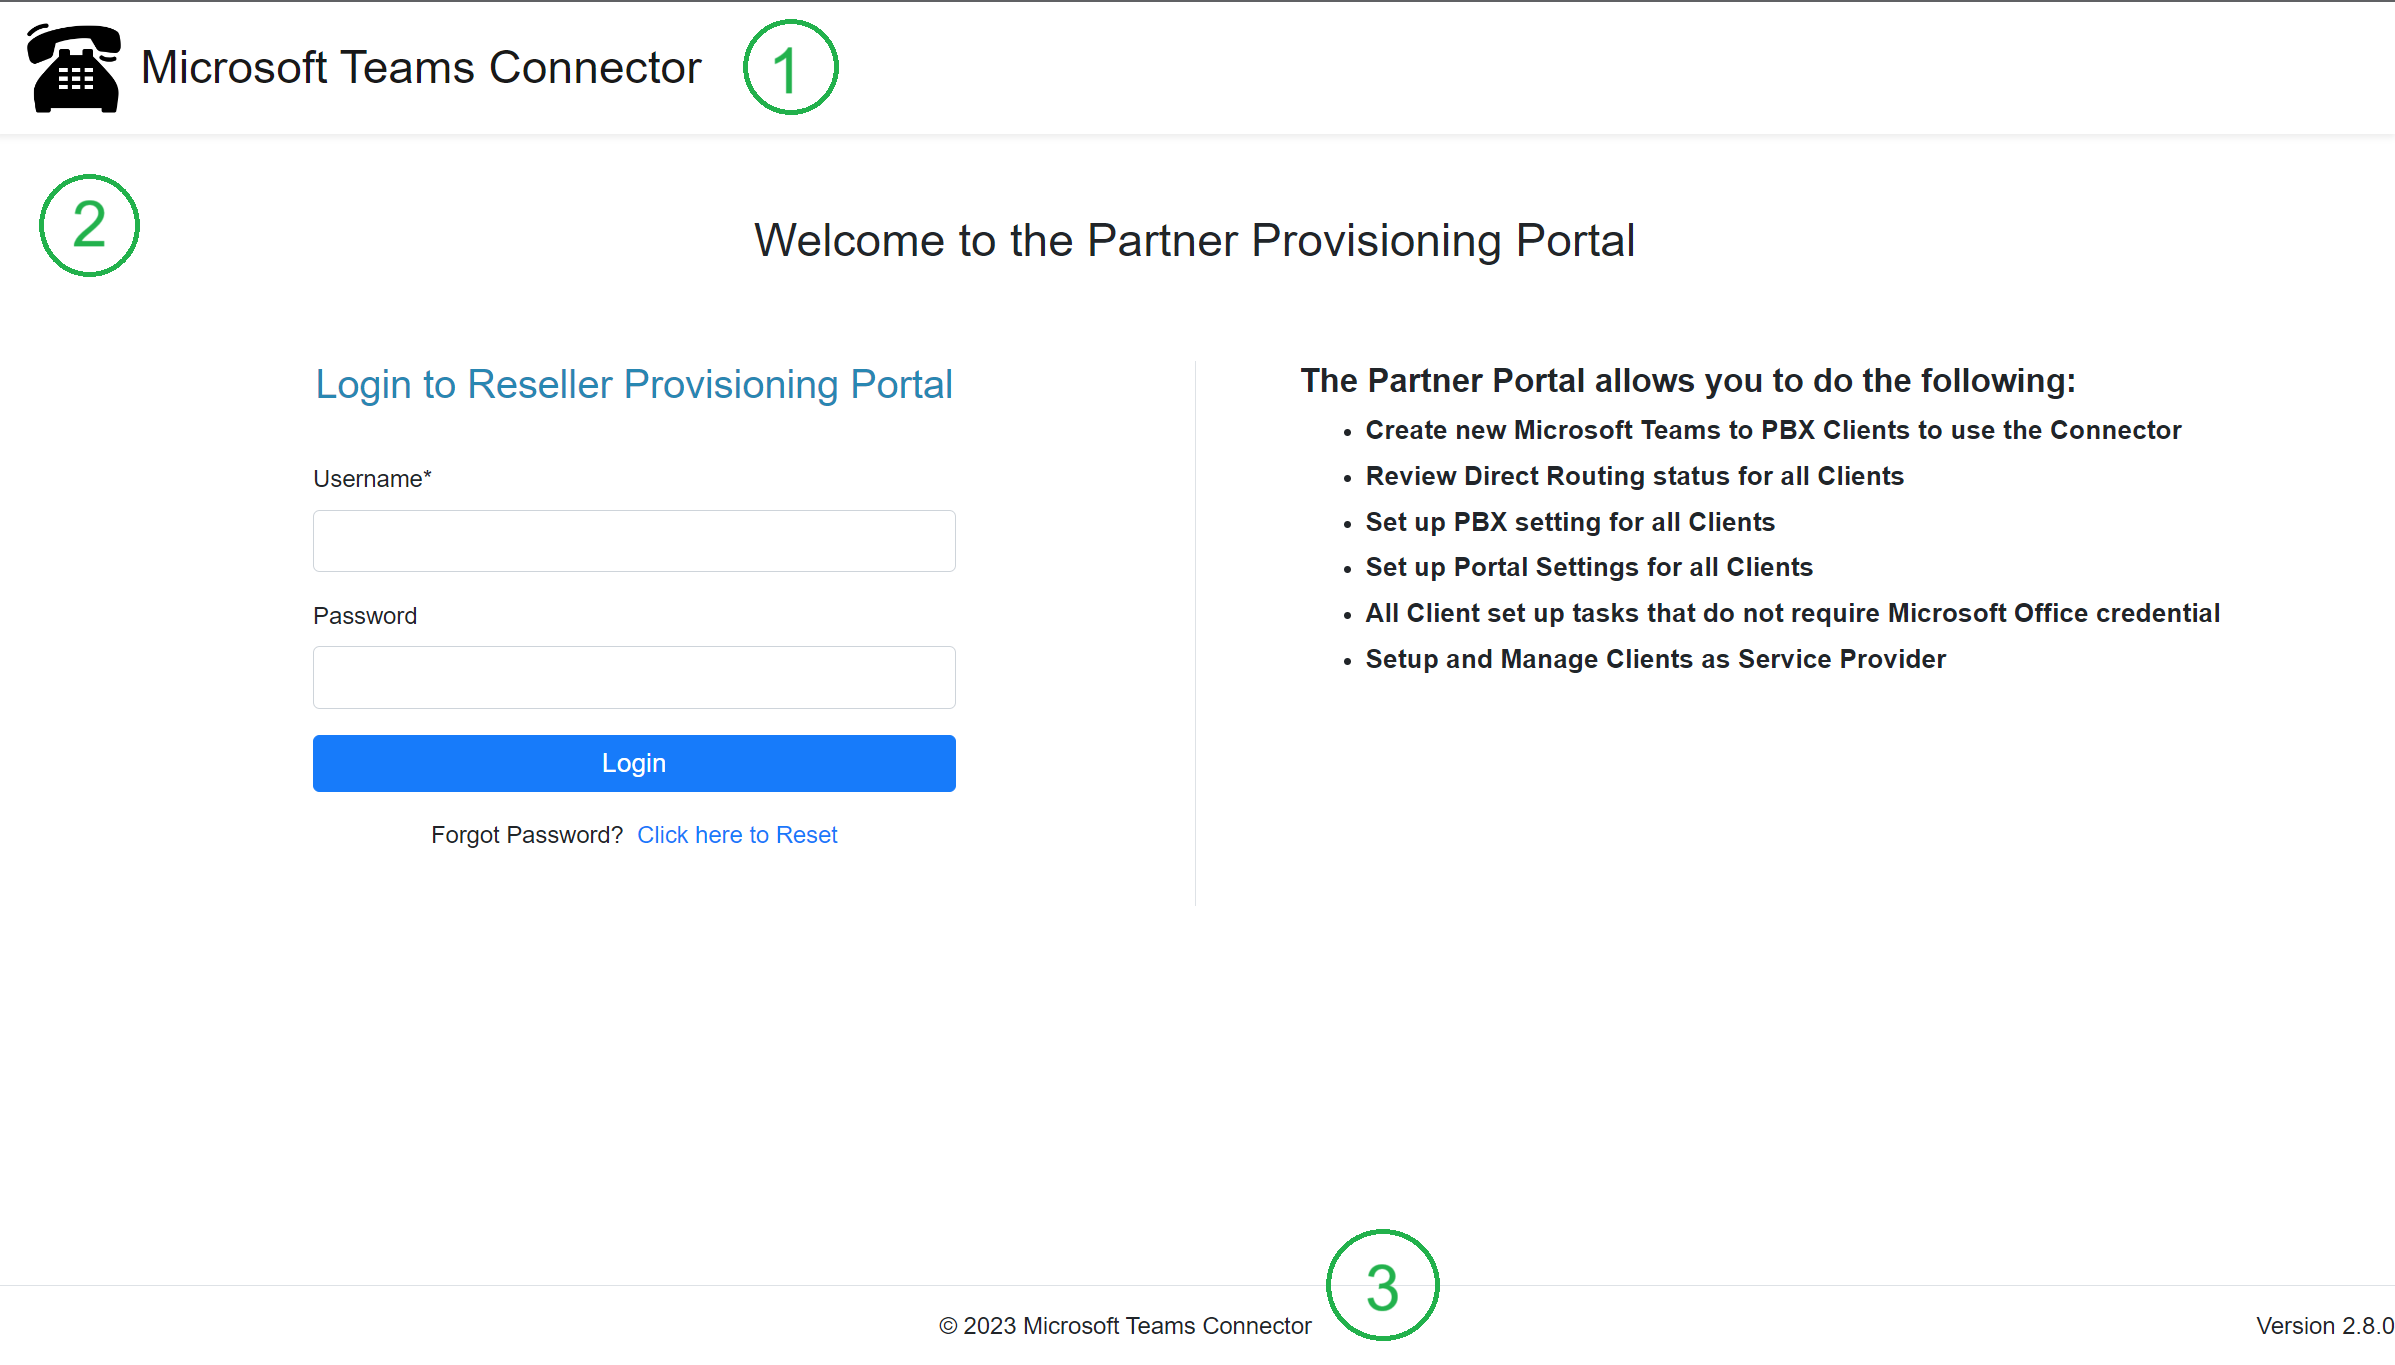
These fields feed over, as shown below.
Results:
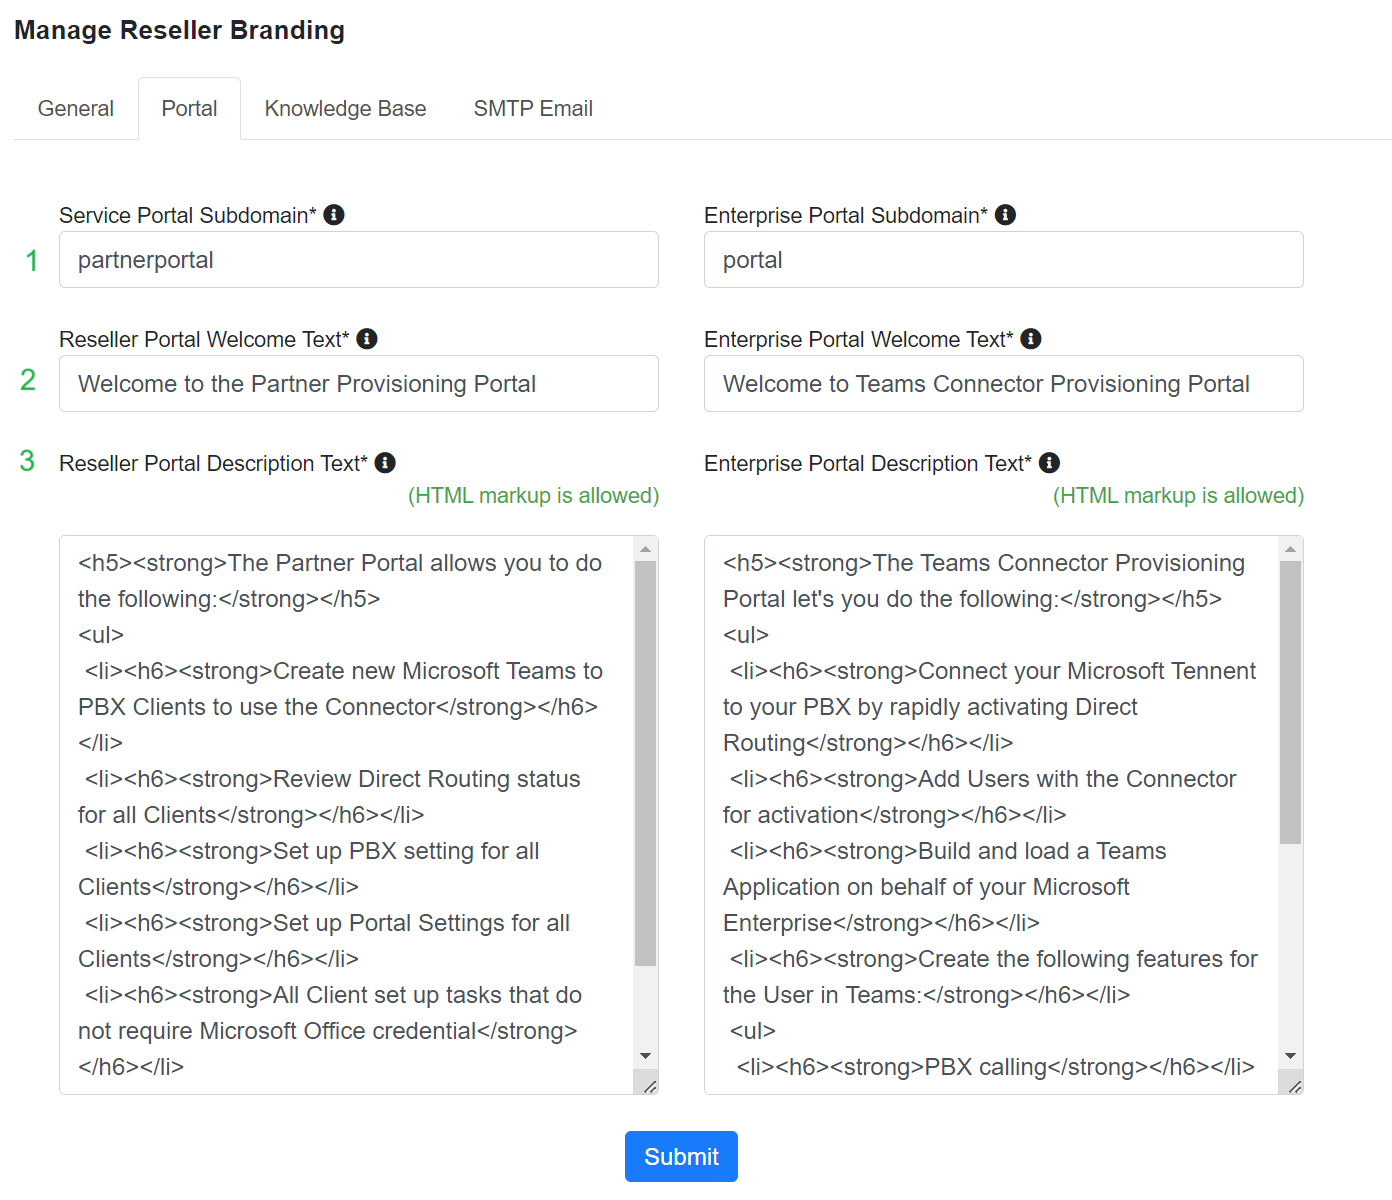
Portal
The settings on this tab control what the Enterprise or Reseller will see when they arrive at the provisioning portal login page. All options on the left will affect the view for the reseller (if you are a Master Reseller), and all options on the right will affect the view for enterprises (business customers). Branding > Portal> Portal
Inputs
- Portal Subdomain (fields 1 and 4): The URL you provide to your business customers to log in will contain the contents of this field plus connecttoteams.com. For instance, if you type in Acmepbx, you can point your business customers to http://acmepbx.connecttoteams.com to arrive at the sign-in page.
Note:
- Customizing your subdomains is mandatory to ensure consistency throughout your customers' experience. The URL determines branding starting at the log-in screen.
- Please ensure these two subdomains are different from each other so the URLs will be distinct.
- These new domains become active in approximately 15 minutes. If any issues arise, please set the default values to "service" (for the service portal) and “enterprise” (for the enterprise portal) and contact support to troubleshoot custom links.
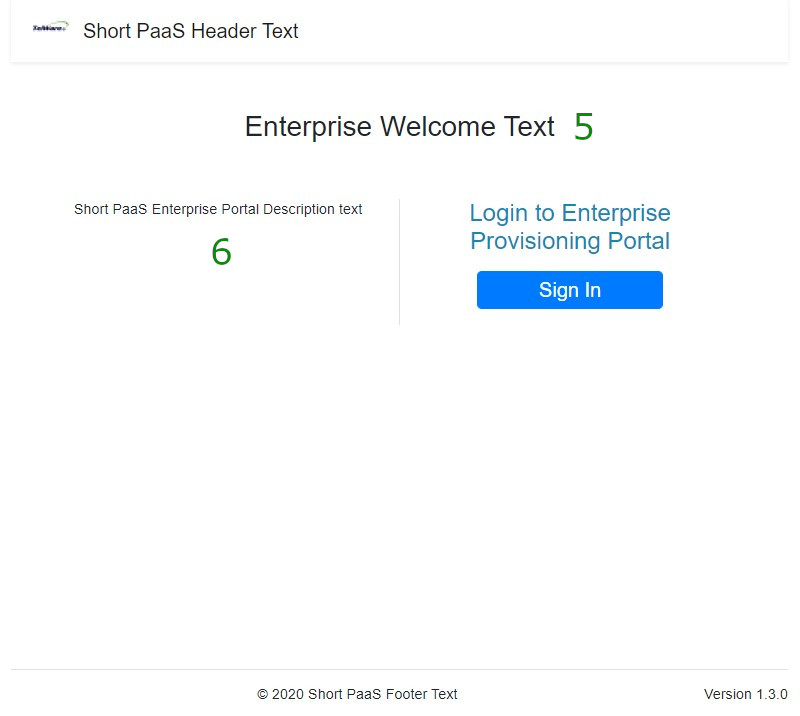
Portal Welcome Text (fields 2 and 5): This is the header text of the main login page, as seen below.
Portal Description Text (fields 3 and 6): This is the body text of the main login page. This field uses standard HTML markup. The HTML can be found here if the text needs to be set back to the default.
Results:
As seen by the Reseller:
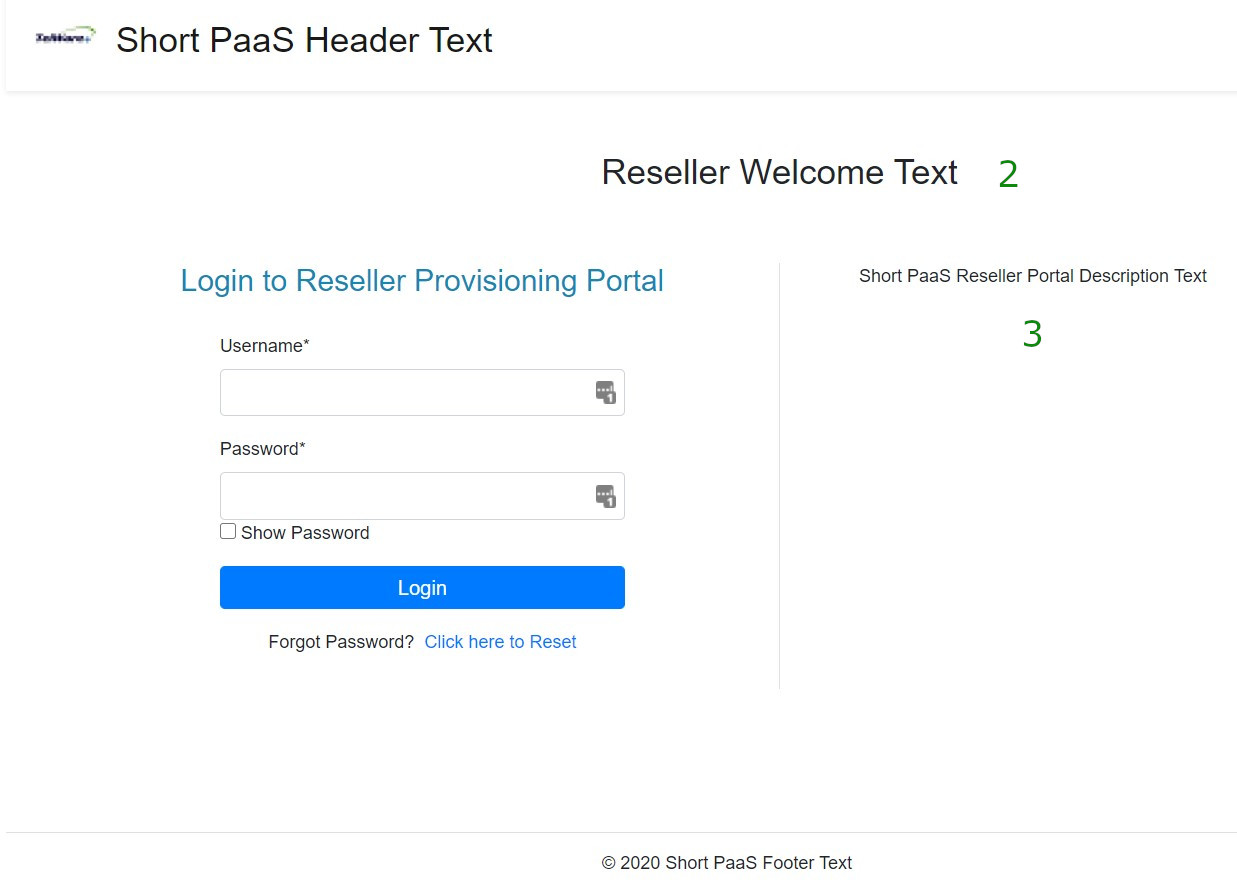
As seen by the enterprises:
Knowledge Base
This section lets you control whether or not the Login levels below your current login can access the Knowledge Base, your own Support/Knowledge Base, or none at all.
- As a reseller, this would affect your enterprises.
Can the Enterprise see the Knowledge Base Link?
- If selected, a link to your knowledge base will appear in the portal as shown below. The default link is https:// kb.iplogin.ca.

Results

SMTP Email
Several emails are sent to the enterprise's Microsoft Global Admin during provisioning. If you set up the SMTP relay, these emails will originate from your chosen email address. You must accurately complete the information below with your SMTP relay service provider and confirm settings in the Microsoft Teams phone Connector portal.

- SMTP Host: Enter the custom SMTP host to replace the default host.
- SMTP Port: If the port number is anything other than 587, enter it here.
- SMTP From Email Address: Enter the address from which you want emails to appear.
- SMTP From Email Username: Enter the name you want to be given to the email address used.
- SMTP uses Auth?: Check this box if your SMTP server requires authentication.
- SMTP enabled TLS?: Check this box if your server enables TLS for authentication.
- SMTP Authentication Username: Enter the SMTP authentication user name.
- SMTP Authentication Password: Enter the SMTP authentication password.