Grandstream UCM Add a SIP Trunk
UCM6102/UCM6104 - 1.0.16.20 firmware
Note - Caller ID must follow the NPANXX standard. The area code (NPA) must be a valid area code and the NXX must be a valid NXX. If the caller ID is not valid, then calls will not route properly and will need to be corrected before calls can be successfully made.
Prerequisites
- SIP Trunk subscription
- SIP Trunk credentials
Description
This article will show you how to setup a SIP trunk on the Grandstream UCM61xx series PBX.
Setting up the SIP Trunk
- Login to the UCM6102/6104 webgui.
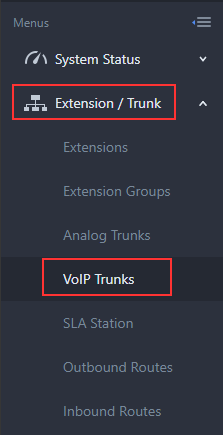
- From the menu, select Extension/Trunk and then VoIP Trunks
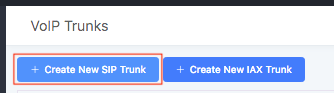
- Click “Create New SIP Trunk
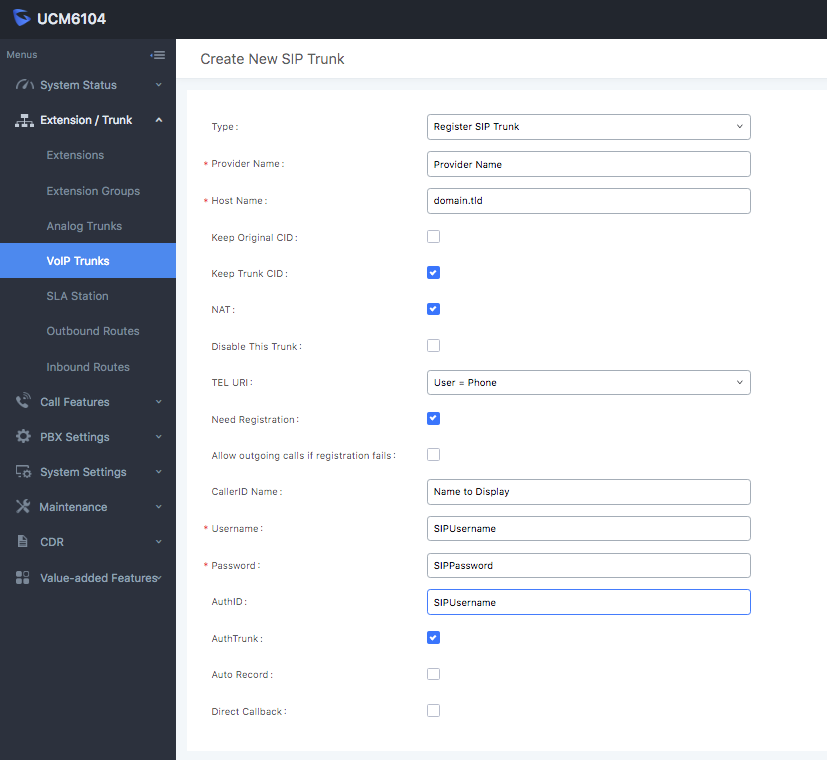
- Enter the required fields.
Field
Description Type
Register SIP Trunk Provider Name
Company Name Host Name
Enter the hostname provided to you TEL URI
Change to User – Phone Allow Outgoing Calls is registration fails
Unchecked CallerID Name
Enter the name you want displayed when dialing a number Username
Enter your SIP Username Password
Enter your SIP Password AuthID
Enter your SIP Username
Leave all other options at their default values.
- Click Save at the top of the screen, a message will appear about ports. Select OK
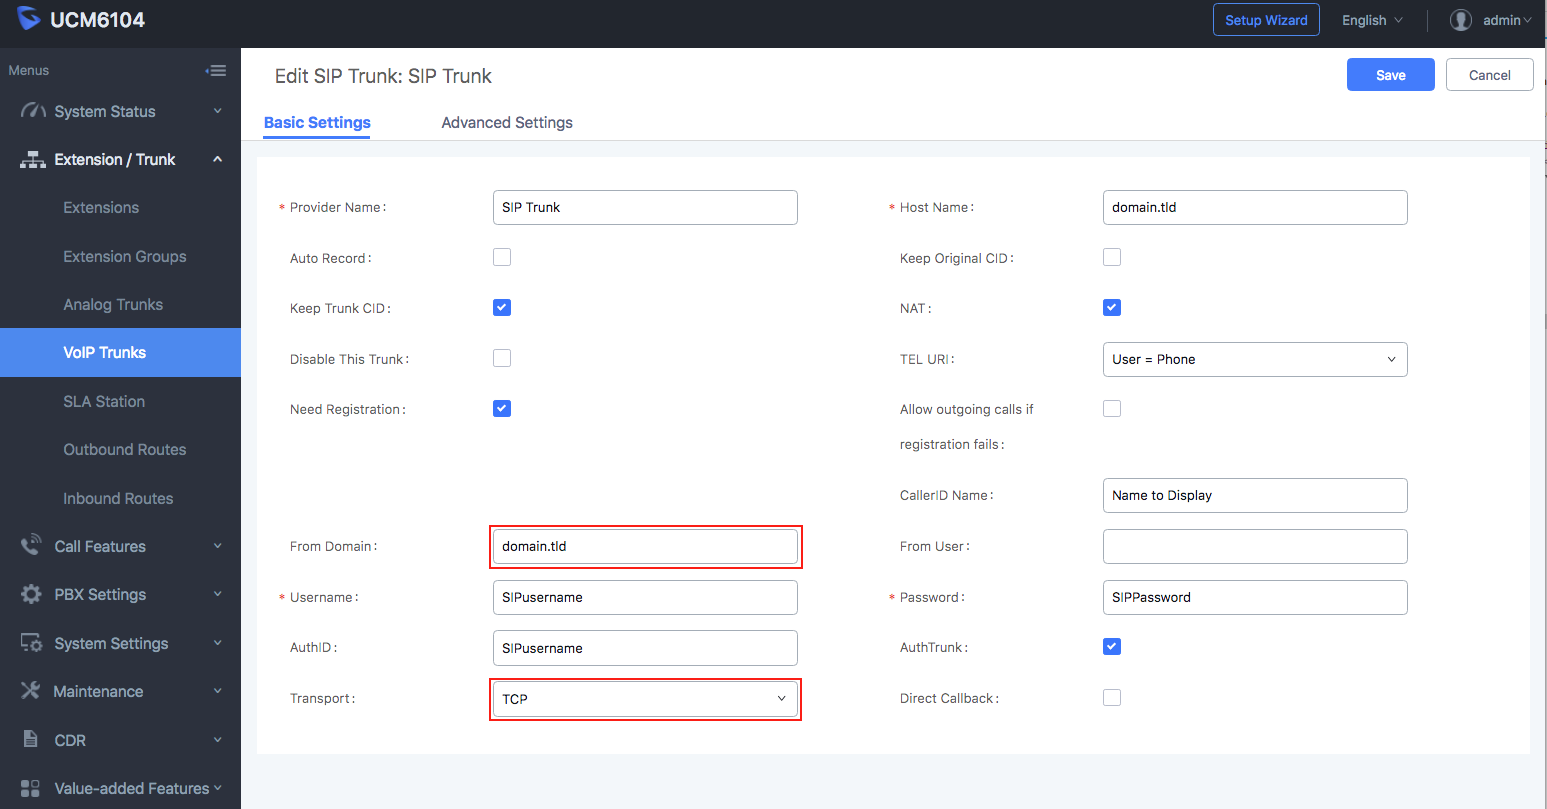
- Locate your new SIP Trunk and click the edit button

- Under Basic Settings, confirm all information entered previously is correct and enter the domain hostname in the From Domain: setting and change the Transport type from UDP to TCP
- Click Advanced Settings
- Here we will update the codecs and enable the Outbound Proxy Support
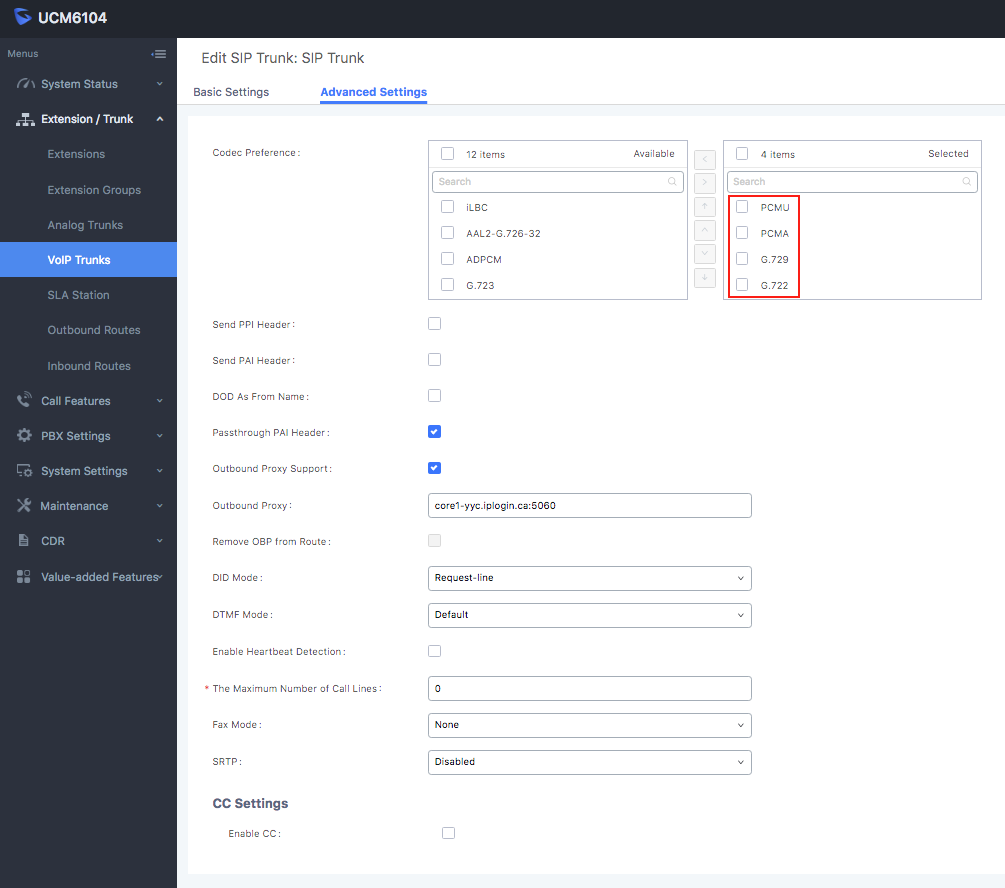
Codecs:
- Ensure PCMU, PCMA, G.729 and G.722 are in the right column and remove all others.
- Enable Outbound Proxy Support by checking the box
- In Outbound Proxy enter sip.siplogin.ca:5060
- Enter the maximum number of call lines. This will match the Outbound Limit set in the Portal SIP Trunk information.

- Click Save and then Apply Changes at the top of the screen.
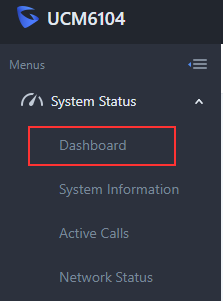
- Click on System Status and then Dashboard
- Locate the Trunks widget and locate your new trunk. Next to the name will be a dot, if all information is correct and the SIP Trunk has registered the dot will be blue. If it is red or yellow, please go back and confirm all information is correctly entered in the SIP Trunk settings.
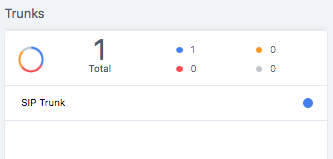
- Your SIP Trunk is now successfully registered.
Field | Description |
Type | Register SIP Trunk |
Provider Name | Company Name |
Host Name | Enter the hostname provided to you |
TEL URI | Change to User – Phone |
Allow Outgoing Calls is registration fails | Unchecked |
CallerID Name | Enter the name you want displayed when dialing a number |
Username | Enter your SIP Username |
Password | Enter your SIP Password |
AuthID | Enter your SIP Username |
Leave all other options at their default values.
Codecs:
- Ensure PCMU, PCMA, G.729 and G.722 are in the right column and remove all others.
- Enable Outbound Proxy Support by checking the box
- In Outbound Proxy enter sip.siplogin.ca:5060
Related Articles
Grandstream GXW4501 Setup
Prerequisites SIP Trunk credentials Description This document describes how to link a legacy PBX (e.g. Nortel, Shoretel, Cisco, Avaya, etc...) to a Grandstream PRI Gateway, the gateway then connects to Unitedcloud via a SIP Trunk and can process ...Grandstream HT81x Setup
Prerequisites Access to the HT81x webgui Office Manager or higher user scope Manual device credentials found here SIP Trunk credentials will require a partner account or support to assist. This KB will go over how to setup basic functionality of the ...Yeastar S-Series - Add a SIP Trunk
Tested on Yeastar S20 - Firmware – 30.11.0.28 Note - Caller ID must follow the NPANXX standard. The area code (NPA) must be a valid area code and the NXX must be a valid NXX. If the caller ID is not valid, then calls will not route properly and will ...Grandstream GXW410X PSTN Gateway Setup
Prerequisites Reseller or Higher scope Access to create a SIP Trunk GXW410x with Firmware version 1.4.1.5 Device can not be added like a normal device, support will need to manually add the device. Account Setup The Gateway requires a SIP Trunk ...Teams Add Trunk
Prerequisite you must create a SIP trunk in the Portal FIRST! - HERE Add Trunk Profile This article provides guidance for filling out the form to add a trunk profile from the reseller provisioning portal. From the Enterprise Dashboard, Navigate to ...